How to change your car's oil: A simple step-by-step guide


0 min. read
Tired of paying a mechanic to change your oil? One of the best ways to start learning about your vehicle is to get under the hood! Read on for supplies, step-by-step instructions, common mistakes, and the benefits of changing your own oil.
1. Reúna sus materiales
Before you start a DIY oil change, review the supplies checklist below along with your vehicle’s owner or service manual. Gather all the necessary supplies ahead of time so you can avoid mid-project trips to the store.
Essential supplies checklist

Protective sheeting or cardboard

Wheel chock blocks

Floor jack and two jack stands

Basic ratchet and socket set

Oil drain pan

Rubber gloves

Safety glasses

Clean rags

New oil filter appropriate for your make and model

Oil filter wrench

Clean funnel

Conventional, blended, or synthetic oil (check your car's manual for the correct type, amount, and viscosity)
2. Encuentre la varilla del nivel de aceite y verifique el nivel de aceite del auto.
Preparing your workspace is all about safety and getting the job done right. Set yourself up for success with these tips:
Park on a level surface that can safely support your vehicle
Ensure you have enough room to move around freely
Work in a well-lit spot
Clear your work area of any dirt or debris
Protect your work surface from spills or stains with a tarp or large piece of cardboard
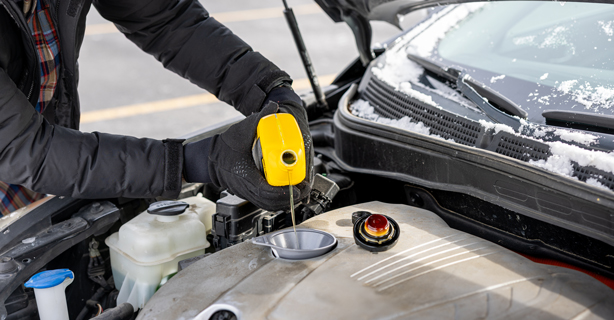
3. Saque la tapa y ponga el embudo
Para poner el aceite, es necesario que encuentre la tapa de carga de aceite en el motor. Debe tener una marca que diga “aceite” o un dibujo de una aceitera. Ponga un embudo limpio en la parte de arriba de la boquilla y prepárese para verter el aceite.
4. Vierta el aceite
Start with a warm—not hot—engine. Wait 30 minutes to allow the engine to cool down to a safe working temperature while still retaining enough warmth for good oil flow.
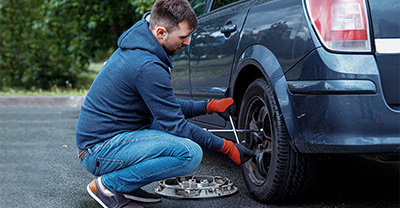
Engage the parking brake and/or insert chock blocks behind the rear wheels to prevent the vehicle from rolling.
Before lifting your car, check the minimum and maximum height restrictions of your jack stands. If your vehicle has a high clearance and you can safely reach the drain plug and oil filter without jack stands, you can skip the next step.
Use a floor jack to raise the front end of the vehicle, one side at a time, before placing a stand under each jack point—a reinforced metal area designed for securely jacking up the vehicle. Raise the vehicle high enough to work comfortably.
Remove any covers or shields from the vehicle undercarriage that are blocking access to the drain plug.
Position your oil drain pan under the plug.
5. Vuelva a revisar el nivel de aceite
Put on personal protective equipment like rubber gloves and safety glasses.
Locate the oil pan and drain plug under the vehicle. Carefully remove the oil drain plug, making sure to keep track of the washer.
Allow the oil to drain completely, usually for at least 10–15 minutes.
Inspect the oil for metal particles or unusual debris that might signal engine problems.
Clean the drain plug thoroughly with a clean rag and inspect the washer. Replace the washer if it shows any wear.
Replace and tighten the drain plug until it’s hand tight, then another quarter turn. Ensure the threads are lined up correctly so it seals completely, but don’t overtighten it.
5. Vuelva a revisar el nivel de aceite
Use la varilla limpia para revisar nuevamente el nivel de aceite y asegúrese de que esté en el nivel correcto y de que no lo llenó demasiado ni muy poco.
Eso es todo, ¡ha llenado el aceite! No olvide también programar o hacer un cambio completo del aceite periódicamente. Aprenda otras maneras de reducir los gastos de reparación haciendo el mantenimiento del auto en casa.
¿Quiere poner a punto su auto? Lea sobre cómo cuidar su auto cuando estuvo estacionado por un tiempo.
¿Está buscando más actividades centradas en el auto? Aprenda cómo lavar su auto correctamente en casa.
Q: Do I really need to wear safety glasses during an oil change?
A: Yes! Hot oil and other contaminants can splash unexpectedly, even when you're being careful. Safety glasses protect your eyes throughout the entire process.
Q: What happens if I lose my oil cap
A: You should never drive without a properly fitted oil cap. The oil cap helps maintain the correct pressure in the engine, keeps dirt and debris—which can damage the engine—out of your oil, and stops oil from splashing around your car's engine compartment. Get a replacement immediately from your auto parts store.
Q: How do I know if water or other contaminants got into my oil?
A: Check your dipstick for milky-looking oil or water droplets. Dirty oil can also cause a viscus buildup under your oil cap that resembles mayonnaise. If you see either of these signs, consult a professional.
Q: I'm just getting started with car maintenance, should I attempt my own oil change?
A: If you're nervous, have an experienced friend guide you through your first one. Many auto parts stores offer free basic maintenance workshops to help you learn.
Q: How long should I wait to check the oil level after adding new oil?
A: Give it 5–10 minutes after shutting off the engine. This lets the oil settle in the pan for an accurate dipstick reading.
Q: Are ramps better than jack stands for oil changes?
A: Both ramps and jack stands have their place. Ramps are often easier for beginners since there's no lifting involved, but make sure they're rated for your vehicle's weight and always use wheel chocks. Some pros prefer jack stands because they offer more working room underneath, but they require proper jack points and careful placement.

The general information in this blog is for informational or entertainment purposes only. View our blog disclaimer.


